
Holiday Cookie Secrets from a Pro Baker: Make Them Irresistible
Folks love cookies all year round, but there is something about the winter holidays…even if you do not typically bake, the urge to bake cookies in December comes on strong! After all, they make perfect office and school party treats, are beloved at bake sales, and are great host gifts, as well. And kids love to help bake them during school break.
I have baked thousands of cookies in my life, having written several books on cookies, and of course, my bakery always had a big selection at hand. I know cookies.
Here are my best tips, so that your cookies are the best they can be.
It Starts With A Great Recipe

If you are using a tried and true recipe, you can skip this section. If you are browsing the Internet or through cookbooks, looking for a new recipe to try, there are a few things to pay attention to.
When it comes to ingredients, look for specificity. Are the eggs large or extra-large? Are they supposed to be at room temperature? Is the cocoa called for natural or Dutched-processed? Is the butter salted or unsalted? When it comes to baking directions, are there time suggestions as well as visual cues? If these things are missing, then you do not have all the information you need for a great result.
Equipment Counts

Are your measuring cups old in dented? Throw them out! If you are using an electric mixer, a handheld mixer and a stand mixer will cream that butter and sugar in vastly different time frames. Ditto for stoves. Let’s say you have to simmer something on top of the stove and the recipe says simmer for five minutes. Five minutes on a stove with low BTUs is completely different from five minutes on a stove with high BTUs.
In addition, the conductivity of the pot that you use will also affect the results. Use all of your senses! This is why time recommendations are great when they are paired with a visual description of what you’re looking for
Especially Cookie Sheets

My first cookie book happened to be on Christmas cookies. Before I started developing the recipes I decided I needed to figure out the absolute best cookie sheet pan. I bought many different pans, ranging from those on the thinner side, to those on the thicker side, air cushioned ones, nonstick ones, you name it.
Hands-down, the only cookie sheet pan I recommend and the only one that I use in my Test Kitchen are commercial grade half-sheet pans. No other pans come close. Plus, they can be used for jelly-roll cakes, roasting vegetables, proteins, et.
What Is A Half-Sheet Pan?

A half-sheet pan is a pan of very specific dimensions: 18 by 13 inches, with a 1-inch rim all the way around.
The commercial grade ones are made from heavy duty aluminum, and they will never warp. They conduct heat evenly, meaning your cookies will bake evenly. I have sheet pans from my restaurant days that have followed me from place to place over the decades, and they are still as good as new.
I love the ones from Nordicware.
What About Air Cushioned Pans?

There was a time when air-cushioned pans were the new kids on the block, and everybody loved them. The idea was that two pans with an air pocket in between would keep your cookies from burning. And they do. But they also retard the kind of browning and caramelization that we want in our cookies. There is a certain amount of browning that is desirable.
And, if you are using a well-constructed pan, like the half-sheet pans I recommend, they’re going to heat evenly, and your cookies are not going to burn!
Get Some Parchment Paper

I have baked cookies directly on pans, on silicone mats, and on parchment paper (to mention the three most popular approaches) and I am a huge fan of parchment paper. Coupled with my favorite pans, that is my preferred approach for most every cookie I bake. Of course, follow directions in individual recipes.
Parchment is available in rolls, like aluminum foil, from kitchenware stores and supermarkets. It can also be cut into triangles to make paper cones. I use these for adding extra jam to Linzer cookies and to write names on cookies for place cards.
Forming Cookies and Ice Cream Scoops

For years I have read recipes that say, “drop batter by teaspoonfuls” and when I took the time to think about it, I realized I had no idea what they meant. If I actually measured a teaspoon-full, it was much tinier than what was intended. If I took two teaspoons out of my utensil drawer (you know, the spoons you use to eat cereal with) and scooped up batter to drop on the cookie sheets, like most home bakers do, there was no uniformity or any way to really know how much batter I was dolling out.
For accurate baking times and yield counts, I like to be more precise. Many drop cookies end up being a generously rounded teaspoon in size and I found an ice cream scoop (called a food disher) that not only facilitates measuring but allows quick scooping and dropping onto cookie sheets since it has a quick release mechanism. If you want to duplicate my recipes as closely as possible, I suggest you get one of these.
It is a Zeroll brand #100 scoop. It will make drop cookie recipes go very quickly and the tool is very easy to use. To use an ice cream scoop effectively for forming cookies, dip the scoop into the batter generously filling the bowl of the scoop. Scrape off the excess batter against the sides of the bowl to form a level scoop, then drop directly onto cookie sheet. Some of the recipes call for a generously rounded tablespoon and that measurement can be doled out with a Zeroll # 40 scoop.
Hand Formed Cookies

If a stiff batter is to be rolled into a ball between your palms, look for specific measurements and directions such as “roll dough between your palms into 1-inch balls”. Actually measure the first cookie with a ruler, then you can roll the rest by eye.
Rolled Cookies, Like Classic Sugar Cookies

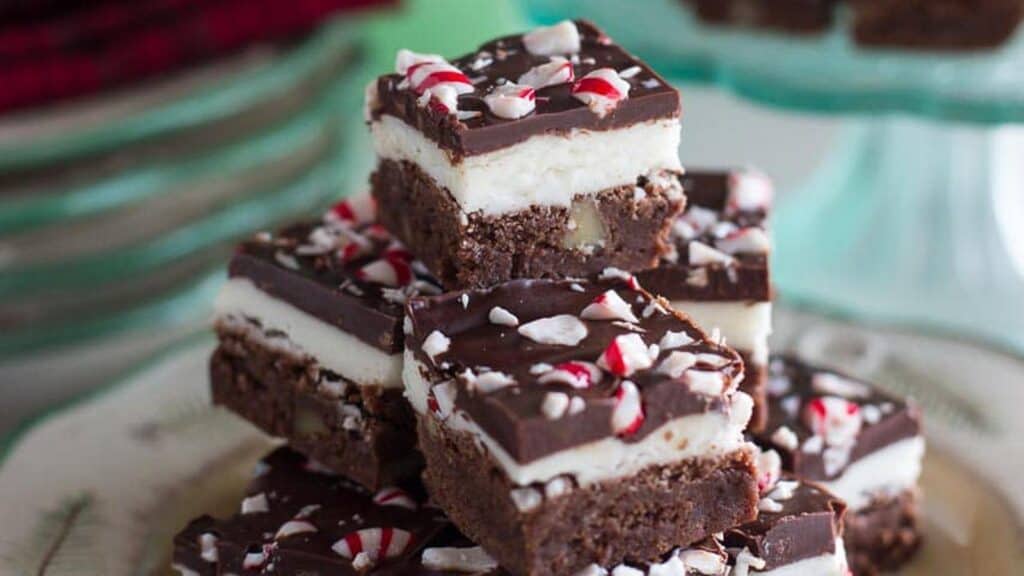
When rolling out dough to cut with cookie cutters, there should be a thickness given such as 1/4-inch. It is a good idea to actually measure the thickness of the dough for accurate results. The cookies above are the BEST gluten-free rolled sugar cookies around!
Baking Times

In my recipes the baking times are approximate and that is why every recipe says, “bake about” a certain number of minutes. A visual description of the cookie is also given. Your oven might have hot spots and/or your cookie sheets might perform differently, so always check for doneness before the suggested baking time – and use those visual cues!
Also, remember, baking is precise. Thirty seconds too long and the cookies you wanted to be chewy will turn crispy. I like digital timers. This one also has a vibration mode. You can place it in your pocket and get a vibration alert, if you do not want sound.
Number of Pans in Oven
Cookies need to have an even flow of heat and air all around them to bake as evenly and beautifully as possible. This is partially accomplished by spacing the cookies on the sheets as directed in individual recipes, but another important technique is to limit the number of pans in the oven at any given time.
While most ovens have at least three racks, I find that baking one or two pans at a time gives the best results. If you crowd the oven, you might burn your cookies or at the very least, get different and unexpected results. Always let pans cool before re-using.
Rotating Pans Halfway Through Baking

To help your cookies to bake as evenly as possible, another technique is to rotate pans front to back (and even between racks) at least once during baking. I am encouraging you to work this into your baking routine as a matter of course.
Cooling Racks

Properly cooled baked goods will have the best texture and cooling racks are necessary to help diffuse heat efficiently. Most cookies will be cooled on their sheet pans, either all the way, or partially. Follow directions. And always cool completely before placing in storage containers.
By the way, if you need to get your cookies off of those hot pans (residual heat) quickly, simply grab a corner of the parchment paper and swiftly transfer paper and cookies directly onto rack.
Pastry Bags

Some require pastry bags, fitted with various tips, for applying decorative icings or for piping out cookies themselves. I like disposable ones in 14-inch or 16-inch. You can also try Featherweight Decorating Bags made by Wilton.
Decorating Tips

Tips are quite inexpensive (usually less than two dollars) and owning a variety will allow you to experiment with different looks. Every tip has a number, but depending on the manufacturer, the numbers can vary. Hopefully your recipes give you a visual cue as well, such as “1/2-inch star tip”, so that you can duplicate my instructions as closely as possible.
Decorator’s Comb

This is a very specialized tool, but it is also very inexpensive. It is a small flat, triangular piece of metal or plastic; each edge has a different design which you drag through icing or chocolate (like on the bottoms of the Florentines) to create a texture and pretty pattern.
Bench Scraper

This is a rectangular piece of stainless steel with a wooden or hard plastic handle along one long side. I use it to gather ingredients together from my work surface, scrape up bits of dry ingredients, like chopped chocolate, spread batter into pans, and scrape my work surface clean after rolling out dough. But my favorite use, is for cutting bars cleanly (see below under How To Cut Bars Neatly & Evenly).
Recipe Yields and Cutting Bars

Recipes will have a “yield” number, which tells you how many cookies or bars you will get. For cookies that are rolled out, the yield will say something like “50, 3-inch cookies”. Perhaps you want to use a cookie cutter of a different size. That’s fine, but your yield will be different.
For bars, a recipe might say “makes 16 bars”. You can divide the pan into horizontal rows of 4 bars by vertical rows of 4 bars to give you the suggested 16 bars. Bars can often be cut smaller or larger, which will alter your yield.
How To Cut Bars Neatly & Evenly
To cut bars, I definitely have a preferred method using a bench scraper. Take the tool by the handle and press the sharp edge straight down into the bars; repeat to make a complete cut either across or down the length of the pan by lifting and pressing, lifting and pressing. If the bars are sticky, wipe the blade clean between cuts with a wet, warm cloth. Cutting in this fashion eliminates the bulk of the drag created by pulling a knife through a pan of bars; the edges will be cleaner and give you prettier results.
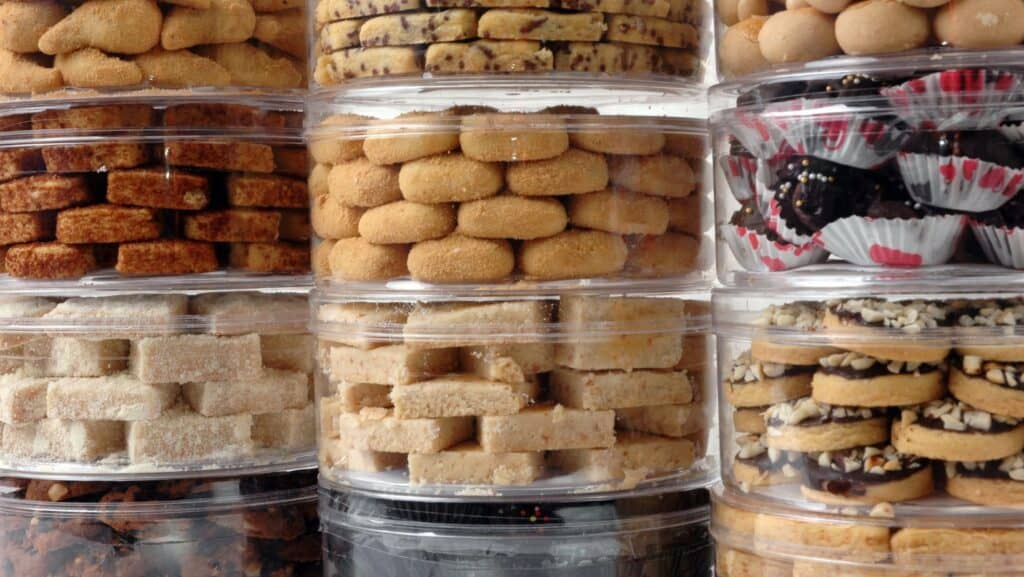
Storing Cookies

Cookies, whether soft, chewy or crisp, will benefit from being stored in an airtight container – but not together! Crisp cookies will become limp if stored with soft ones. And, storing sugar cookies with gingerbread and minty cookies is a recipe for disaster, as flavors will blend, and all the cookies will take on a weird taste and lose their original, pristine gloriousness.
Make sure to have enough tins and airtight containers for all of your cookies. I go to the dollar store and stock up!
Also, be sure to cool cookies completely before placing in a storage container or the heat might create condensation.
Enjoy!

May your holidays be filled with creative, fun, delicious cookie treats!
Perfect Cookie Trays and Tins: Expert Tips for Storing and Sharing
Even if you have your own tried and true holiday cookie recipes, we are here to help you make them better, especially when creating cookie trays and tins for holiday entertaining. And if you need recipes, we have those, too!
Assuming your recipes yield fantastic cookies, you still have to know how to store them, arrange them, and prepare them for mailing, in order to preserve their flavors and textures. I will show you how. I have mailed cookies all over the world – and they arrive just as pristine as when I packaged them up.
READ: Perfect Cookie Trays and Tins: Expert Tips for Storing and Sharing
Join Us

Join us on this empowering journey as we explore, celebrate, and elevate “her story.” The Queen Zone is not just a platform; it’s a community where women from all walks of life can come together, share their experiences, and inspire one another. Welcome to a space where the female experience takes center stage. Sign up for our newsletter so you don’t miss a thing, Queen!